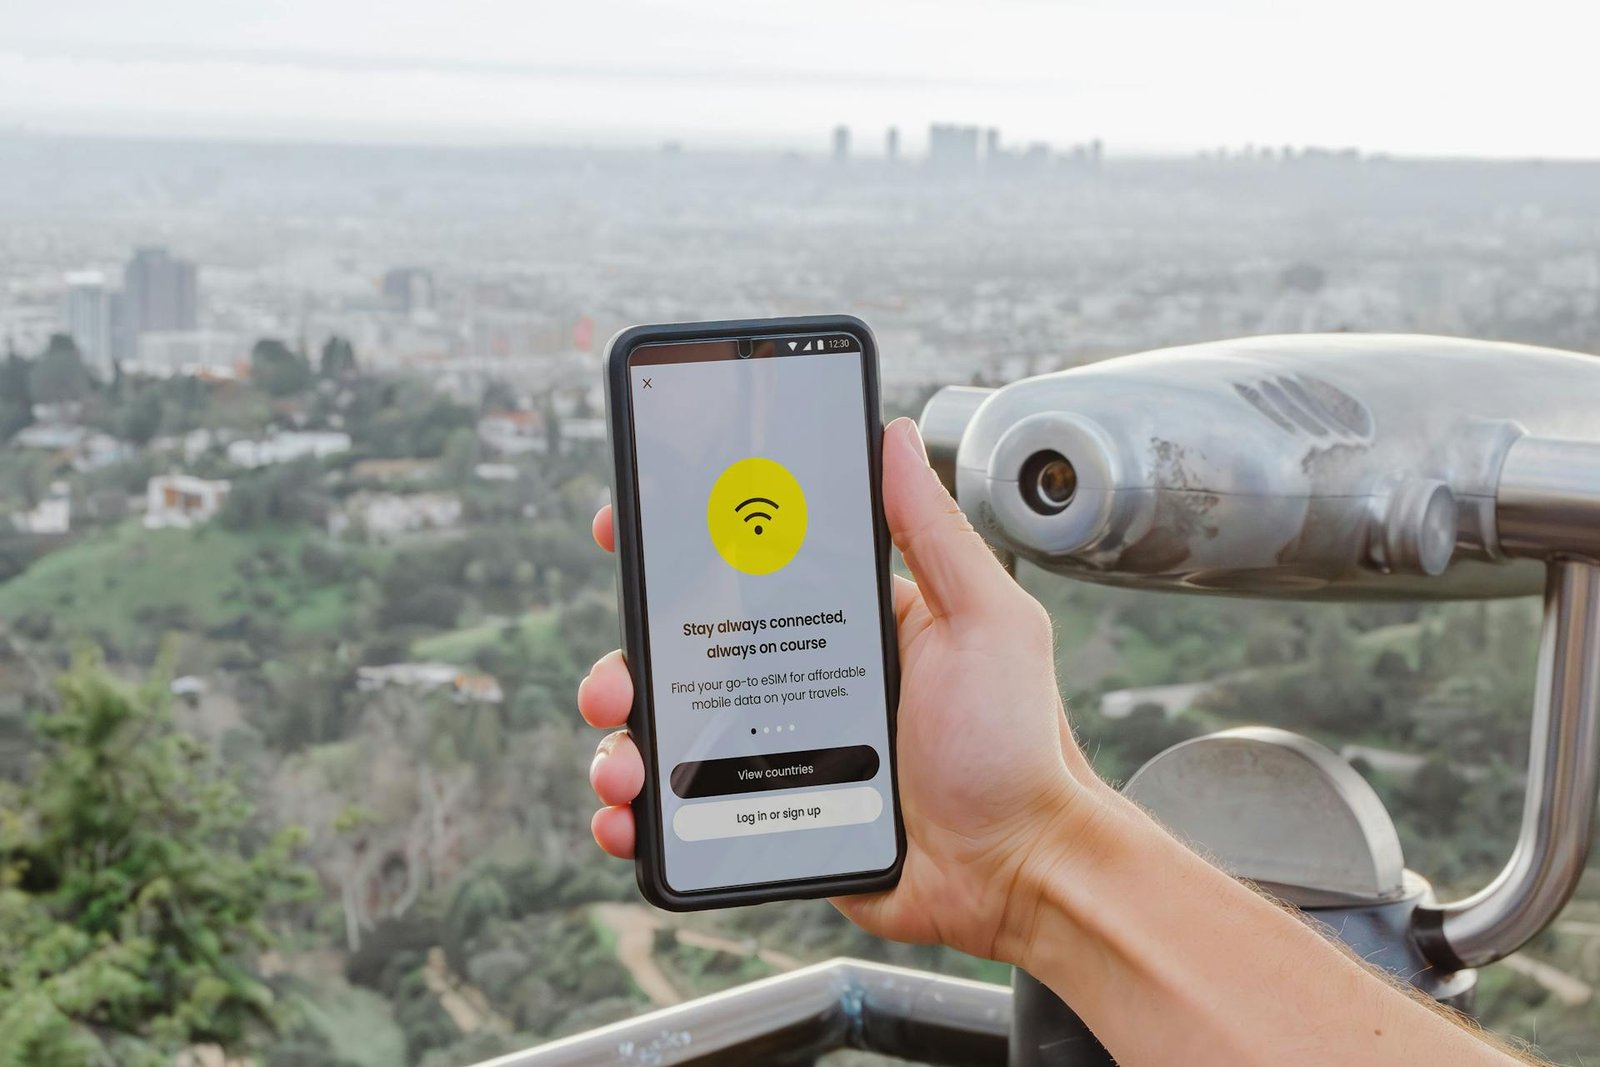
Staying connected is super important for anyone working remotely. As a digital nomad, your phone is often your lifeline to clients, family, and new opportunities. In 2025, eSIMs are truly making mobile data simpler for travelers. Think of an eSIM as a digital SIM card. It’s built right into your phone, so you don’t need a tiny plastic chip. This means you can get a data plan for a new country with just a few taps! It’s incredibly handy and saves a lot of hassle.
This guide will walk you through setting up an eSIM. We’ll cover everything you need to know. This includes checking if your phone works with eSIMs. Then, we’ll show you how to activate your new data plan. Get ready to enjoy easy and affordable mobile data on all your adventures!
Part 1: What Exactly is an eSIM and Why Should You Use One?
Before we dive into the steps, let’s quickly understand what an eSIM offers.
What is an eSIM, Really?
An eSIM is a tiny, embedded chip inside your smartphone or tablet. Unlike the physical SIM card you might be used to, an eSIM is programmable. This means it can store your mobile plan information digitally. Instead of swapping out a little card, you simply download a new “profile” or data plan to this chip. It’s like having multiple digital SIM slots in your phone.
Why Digital Nomads Love eSIMs So Much
eSIMs offer some huge advantages for people who travel a lot for work:
- No More Physical SIM Swapping: This is perhaps the biggest benefit. You won’t waste time hunting for local phone shops. You also won’t deal with tiny, easily lost plastic cards. Just download your plan, and you’re good to go.
- Keep Your Home Number Active: With an eSIM, you can often keep your physical SIM card in your phone. This means your home number stays active for calls or texts. Meanwhile, your eSIM handles all your data needs in a new country.
- Instant Activation: Many eSIM plans activate almost immediately after purchase. This means you can land in a new country and have internet access within minutes, often before you even leave the airport.
- Multiple Plans at Once: Most modern devices can store several eSIM profiles. You can switch between different data plans for various countries easily, all from your phone’s settings.
- Better for the Planet: Using eSIMs means less plastic waste from discarded SIM cards. It’s a small but positive environmental impact.
Part 2: Before You Begin – Checking Your Device’s Compatibility
Not every phone can use an eSIM. So, your very first step is to confirm if your specific device is compatible. This will save you a lot of time later.
Does Your Phone Work with eSIMs?
Most newer smartphones from the past few years do support eSIM technology. This includes:
- iPhones: iPhone XS, iPhone XR, and all models released after them (this includes every iPhone 11, 12, 13, 14, and 15 series). Important Note: Some iPhones sold specifically in mainland China do not have eSIM support.
- Samsung Galaxy: The Galaxy S20, S21, S22, S23, S24 series, Note 20 series, and all the Fold and Flip models, plus any newer releases.
- Google Pixel: Pixel 3, 4, 5, 6, 7, 8 series, and their newer versions.
- Other Brands: Some specific models from Huawei, Motorola, Xiaomi, Oppo, and other manufacturers also support eSIM. If you’re unsure, it’s best to check your phone’s settings or visit the official website of your phone’s maker.
How to Quickly Check Your Phone
Here’s how to find out if your phone supports eSIM:
- For iPhones: Go to Settings > General > About. Scroll down and look for a section labeled “Add eSIM” or “Digital SIM” under “SIMs” or “Cellular Plan.” If you see this option, your iPhone is good to go.
- For Android Phones (Steps might vary slightly by brand/model): Go to Settings > Network & internet (or “Connections” on some Samsung phones) > SIMs (or “Mobile Network”). Look for an option that says “Add eSIM,” “Download a SIM,” or “Add cellular plan.” If you find any of these, your Android device supports eSIM.
Part 3: Choosing Your eSIM Provider and Plan
Once you know your phone is ready, it’s time to pick an eSIM provider. Many companies offer data plans specifically for travelers and digital nomads.
Popular eSIM Providers for Travelers
These services are widely used by nomads for good reason:
- Airalo: This is one of the most well-known global eSIM marketplaces. It offers plans for over 200 countries and regions. You can find local plans (for one country), regional plans (for several countries in an area), or even global plans.
- Holafly: This provider is popular for offering unlimited data plans in many countries. If you’re a heavy data user or rely on video calls, this might be a great choice.
- Nomad: Another solid option that provides various data plans for countries worldwide. They often have competitive pricing.
- Local Carriers: Sometimes, you can buy an eSIM directly from a local phone company in your destination (like AIS in Thailand or Vodafone in Portugal). However, this often requires you to visit their physical store, which might not be ideal right after you arrive.
Key Tips for Choosing the Right Plan
Consider these points before buying:
- Your Destination: Make sure the eSIM provider covers the specific country or region you’re traveling to.
- How Much Data You Need: Think about your typical usage. How much data do you normally use in a week or month? Pick a plan that matches your habits. Unlimited plans are great if available.
- Plan Validity: How long will you be in that country? Choose a plan that lasts for the right number of days, weeks, or months.
- Cost Comparison: Always compare prices between different providers for similar data amounts and validity periods.
- Read Reviews: Look for reviews from other travelers. This can give you insights into network quality and customer support.
Part 4: Step-by-Step eSIM Setup Guide
Now, let’s get your eSIM up and running! The process is usually quite simple, but it helps to know what to expect.
Step 1: Purchase Your eSIM Plan
- Download the App: First, download the eSIM provider’s app (like Airalo or Holafly) from your phone’s app store (Apple App Store or Google Play Store).
- Browse Plans: Open the app and use the search function to find your destination country.
- Choose Your Plan: Select the data amount and how long the plan will last. For example, “5GB for 30 days.”
- Buy the Plan: Complete the purchase within the app using your credit card or preferred payment method.
Step 2: Install Your eSIM (This is the Crucial Part!)
After buying your plan, the provider will give you instructions to install the eSIM. There are usually two main ways to do this:
Method A: Direct Installation (Most Common and Easiest)
This method is often available through the eSIM provider’s app.
- Open the eSIM App: The app will have a clear button, usually labeled “Install eSIM” or “My eSIMs.” Tap it.
- Follow On-Screen Prompts: The app will guide you through your phone’s settings automatically. It will fill in the eSIM details for you.
- Confirm Installation: Your phone will pop up a message asking you to confirm adding a new cellular plan. Tap “Continue” or “Add Cellular Plan.” That’s it!
Method B: QR Code Installation
Sometimes, the provider gives you a QR code (either in their app or via email).
- Display the QR Code: You need a second device (like another phone, a tablet, or a computer) to show the QR code. Your main phone cannot scan a QR code from its own screen.
- On Your Phone (iPhone): Go to Settings > Cellular (or “Mobile Data“) > Add eSIM (or “Add Cellular Plan”) > Use QR Code. Then, use your phone’s camera to scan the QR code displayed on the second device.
- On Your Phone (Android – steps vary slightly): Go to Settings > Network & internet (or “Connections”) > SIMs (or “Mobile Network”) > Add eSIM (or “Download a SIM”) > Scan QR Code. Scan the QR code with your phone.
- Follow Prompts: Your phone will then guide you through the rest of the installation steps.
Method C: Manual Installation (Less Common)
In some cases, you might receive manual details (like an SM-DP+ Address and Activation Code).
- On Your Phone (iPhone): Go to Settings > Cellular (or “Mobile Data“) > Add eSIM > Enter Details Manually. Type in the information provided by your eSIM provider.
- On Your Phone (Android): The path is similar to the QR code method, but you’ll choose an option like “Enter Manually” instead of scanning.
Step 3: Activate Your eSIM and Configure Settings
Once the eSIM is installed, you need to tell your phone to use it for data.
- Go to Cellular/Mobile Data Settings:
- iPhone: Settings > Cellular (or “Mobile Data“).
- Android: Settings > Network & internet (or “Connections”) > SIMs (or “Mobile Network”).
- Label Your eSIM: Your phone will usually give the new plan a generic name like “Secondary” or “Travel.” It’s a good idea to rename it to something clear, like “Thailand Data” or “Portugal eSIM.” This helps you manage multiple plans.
- Set for Mobile Data: Under the “Cellular Data” or “Mobile Data” section, select your newly installed eSIM. This tells your phone to use this plan for internet access.
- Turn On Data Roaming (if your plan needs it): Some eSIM plans, especially those that cover multiple countries, require you to turn “Data Roaming” ON for the eSIM. Always check your provider’s specific instructions. If it’s a local eSIM for just one country, roaming might not be necessary.
- Turn Off Home SIM Data (Highly Recommended!): To avoid unwanted roaming charges on your primary, physical SIM card, go to its settings and turn off “Data Roaming” for that SIM. You can usually still use your home SIM for calls and texts if needed, even with data roaming off.
- Verify Connection: Once these settings are done, you should see a signal strength indicator for your eSIM. Try opening a web page or an app that uses data (like Google Maps) to confirm you have internet access.
Troubleshooting Common eSIM Issues for Nomads
Even with a smooth process, things can sometimes go wrong. Here are quick fixes for common problems:
- “No Service” or “No Data” After Setup:
- Restart your phone: This simple step often fixes minor glitches.
- Check APN settings: Your eSIM provider’s app or website will have the correct APN (Access Point Name) details. Go to “Mobile Data Network” (iPhone) or “Access Point Names” (Android) in your phone’s settings and manually enter it.
- Confirm Data Roaming: Double-check that “Data Roaming” is ON for your eSIM if your plan requires it.
- Check Coverage: Ensure you are in an area with network coverage. Sometimes, it’s just a dead zone.
- “eSIM Not Added” or Installation Fails:
- Stable Wi-Fi: Make sure you have a strong and stable Wi-Fi connection during the installation process.
- Try Again: Sometimes simply restarting the installation process from the beginning can resolve it.
- Contact Support: If the issue continues, reach out to the eSIM provider’s customer support. They can often provide specific troubleshooting steps or reset your profile.
- Accidentally Bought the Wrong Plan:
- Act Fast: Contact customer support immediately after realizing the mistake. Many providers offer refunds or exchanges if the plan hasn’t been activated or used yet.
Final Thoughts: Embrace the eSIM Revolution for Seamless Travel!
eSIMs truly make staying connected a breeze for digital nomads. They remove the hassle of physical SIM cards and offer almost instant internet access. By following this step-by-step guide, you can set up your eSIM quickly and easily. This frees you up to focus on your work, explore new places, and really enjoy the freedom of the digital nomad lifestyle. To learn more about other aspects of living and working abroad, check out our guide on Living Abroad as a Digital Nomad.
Get ready to experience seamless travel in 2025. Enjoy the confidence of always having data, wherever your remote work journey takes you across the globe!